Launching the Panintelligence dashboard from AWS Marketplace
Prerequisites
To complete this documentation, we assume you have a Route 53 hosted zone, an ACM certificate that is validated and covers the domain you will be using for the load balancer, an S3 bucket for backups and a key pair to allow you SSH access to the server.
Recommended Setup
Following this recommended setup will allow you to launch a Panintelligence dashboard from AWS Marketplace.
To allow SSH access to the instance after following this setup, you will need to configure a bastion host with access to the instance. Instructions on how to do this can be found at https://aws.amazon.com/quickstart/architecture/linux-bastion .
VPC
Select the Your VPCs link to the left side of the VPC Dashboard.
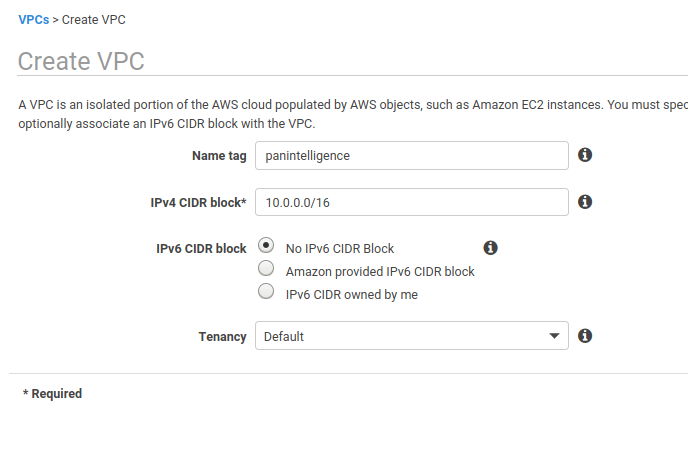
In the VPC console, create a new VPC. You can use your own configuration or copy the one in the screenshot below.
Take a note of the VPC id when you create the VPC.
Subnets
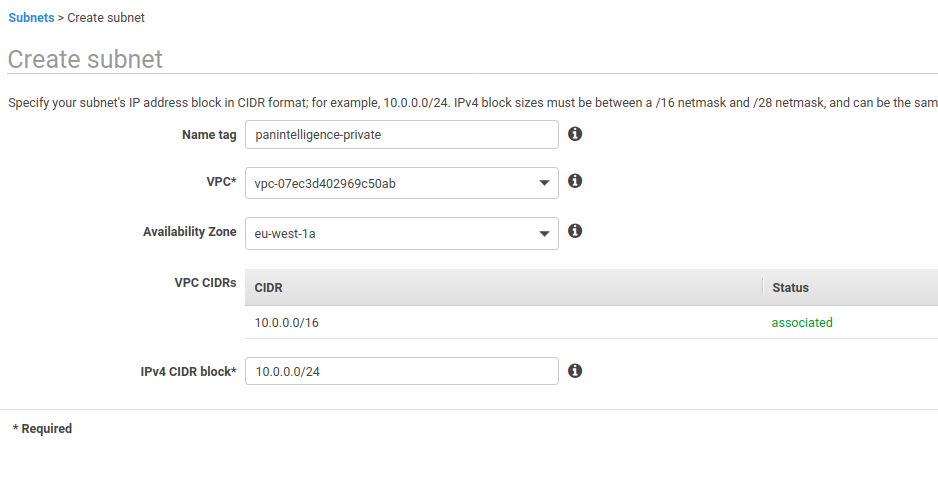
After creating a VPC you will need to create a private subnet for the dashboard application and two public subnets for the load balancer.
In the subnet section of the VPC service, create a subnet.
You can choose your own Name tag, Availability Zone and IPv4 CIDR block if you know what to set. Our recommendations are shown in the screenshot below. Take a note of the subnet id of the created subnet.
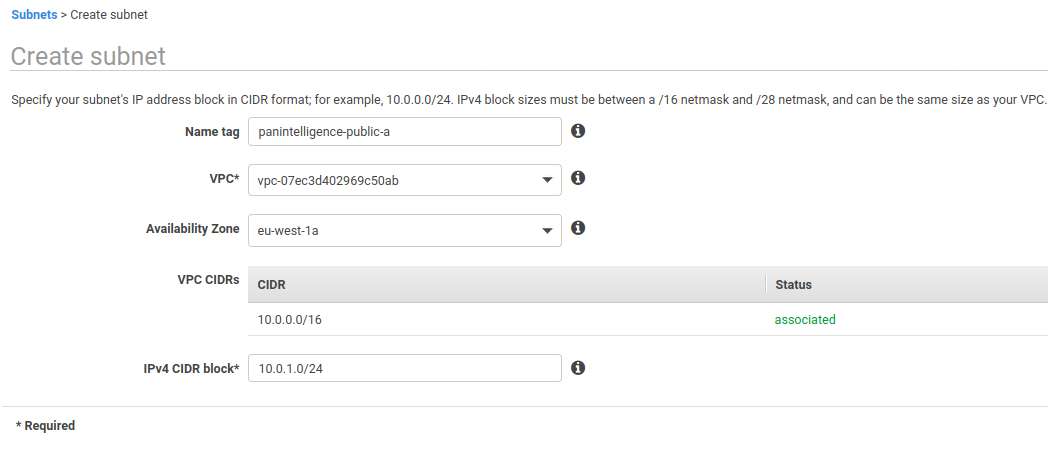
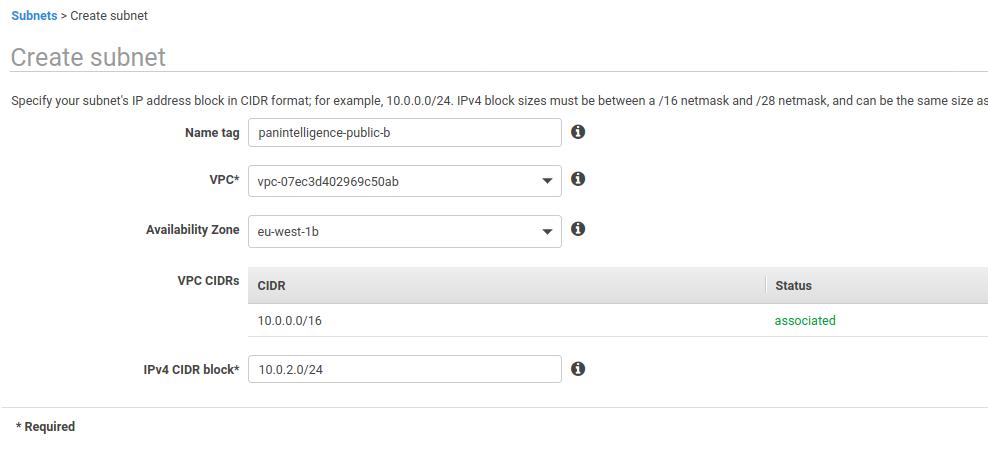
Next, create two more subnets using the configuration in the two screenshots below.
You can choose your own configuration for Name tag, Availability Zone and IPv4 CIDR block, but make sure the availability zones and IPv4 CIDR blocks are different.
Internet Gateway (IGW)
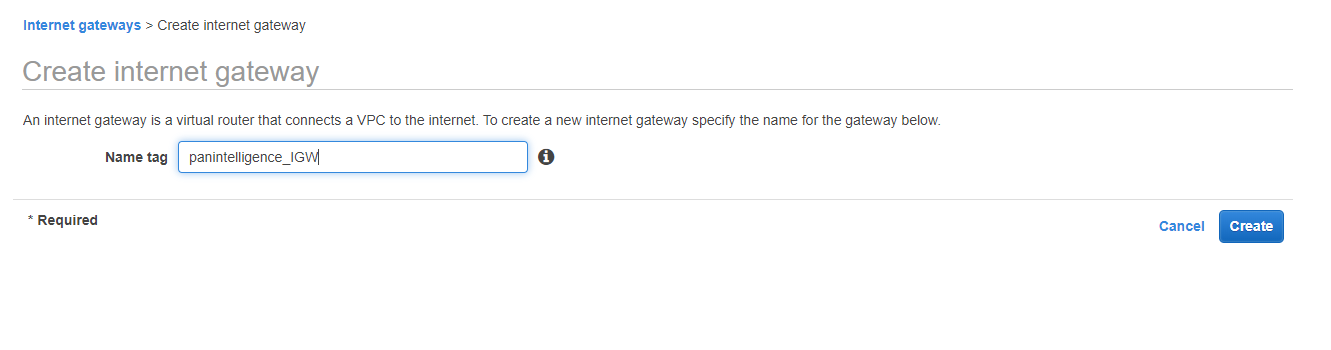
To the left of the VPC dashboard select Internet Gateways and create an IGW.
You will need to create an IGW to route traffic from the VPC to the internet.
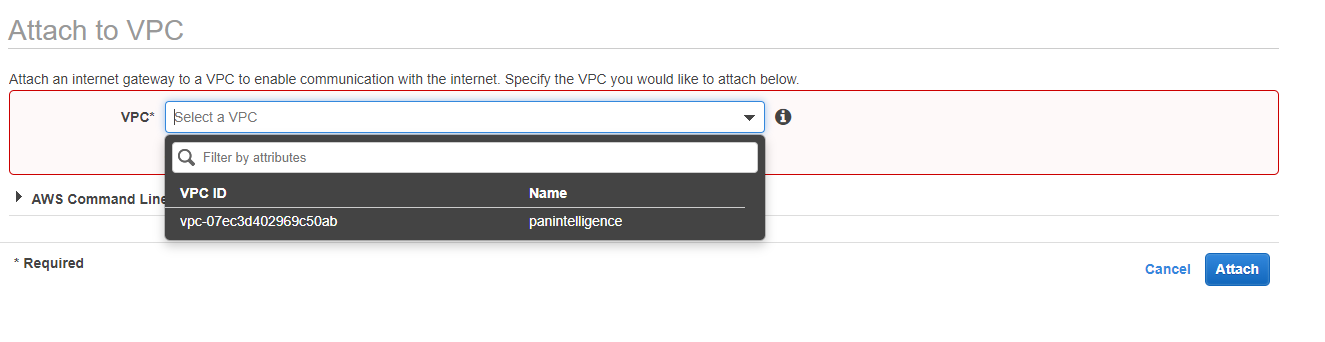
You then need to attach the IGW to the VPC. To do this, select the IGW you just made, select the Actions dropdown and select Attach to VPC from the dropdown. Select the VPC you created earlier.
Route Tables
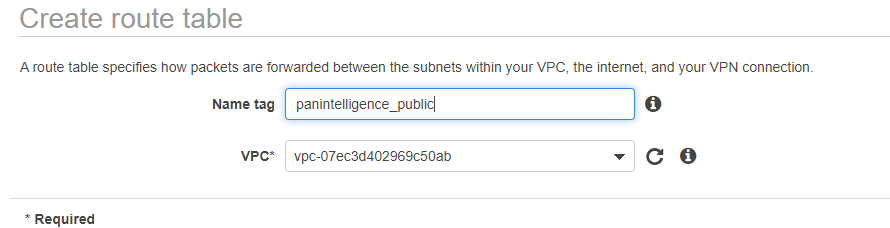
To the left of the VPC dashboard select Route Tables and create a route table.
You need to create a route table to route traffic from your public subnets to the IGW.
Give the VPC a name and select the VPC you created earlier.
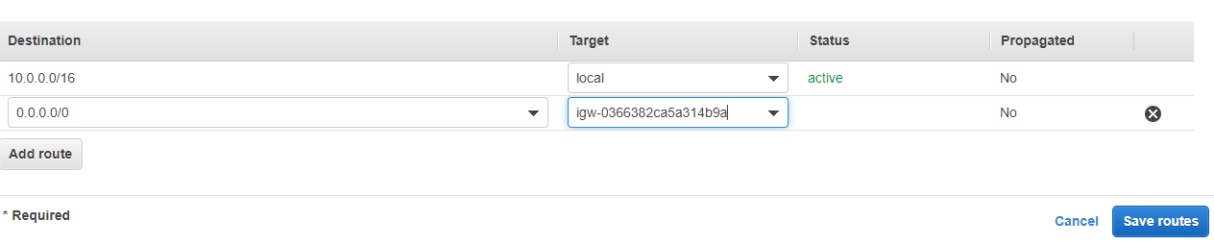
You then need to configure the route table to direct all traffic to the IGW.
To do this, select the route table and select the Routes tab at the bottom. Then select Edit routes. Configure the route to be the same as the screenshot below. For the target select the IGW you created.
After editing the routes, select the Subnet Associations tab at the bottom and select Edit subnet associations.
Select the two public subnets you created earlier, as shown in the screenshot below. Make sure you select the public subnets and not the private subnet.
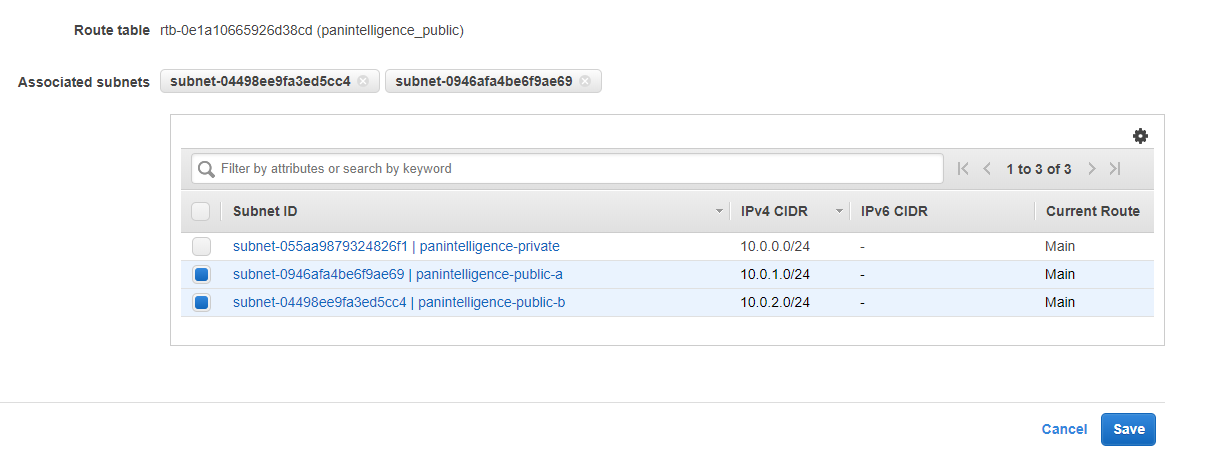
The private subnet will automatically use the default route table which does not have access to the internet.
Network Access Control List (NACL)
To the left of the VPC dashboard select Network ACLs and create a network ACL.
We suggest creating NACLs to add an additional layer of security to your stack.
We need to create a NACL for the public subnets.
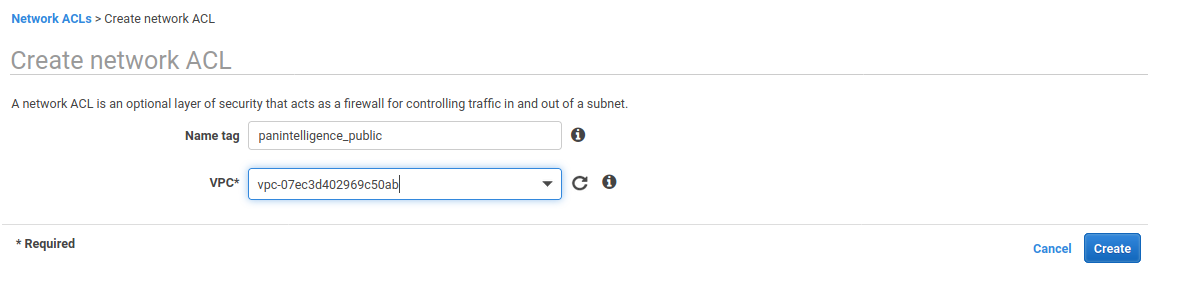
Create a NACL, using the configuration in the screenshot below. Make sure to set the VPC to the one you created earlier.
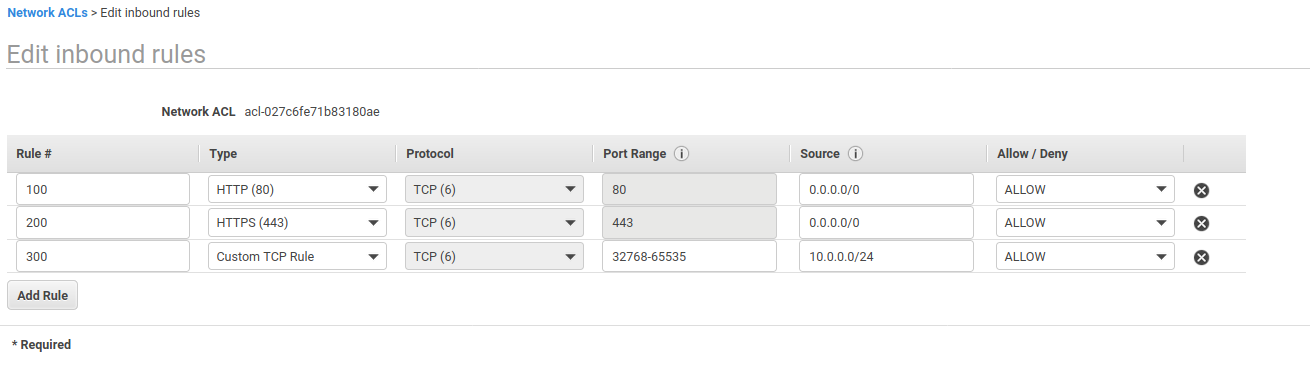
Select the NACL you just created. Select the Inbound Rules tab. Edit the inbound rules and configure it like the screenshot below.
Make sure you replace the CIDR block with the private subnet CIDR block if you changed it when creating the subnets.
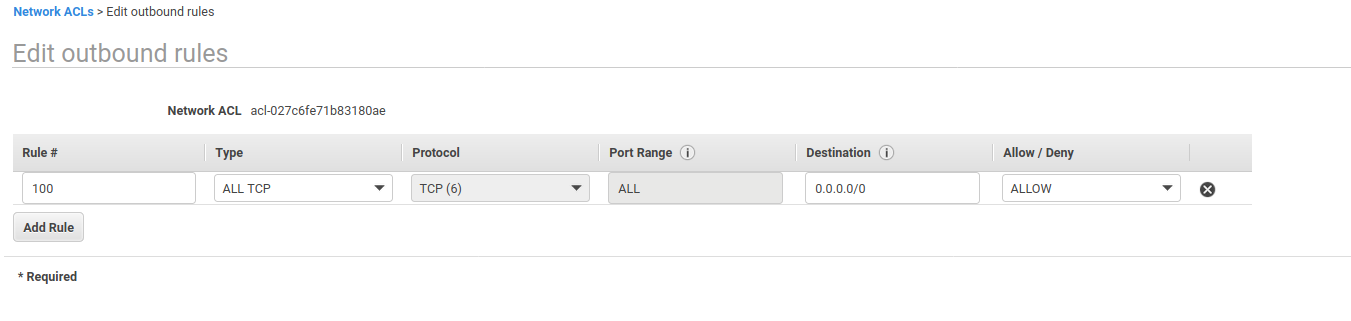
After saving the inbound rules, select the Outbound Rules tab and edit the outbound rules.
Configure the outbound rules to be the same as the screenshot below.
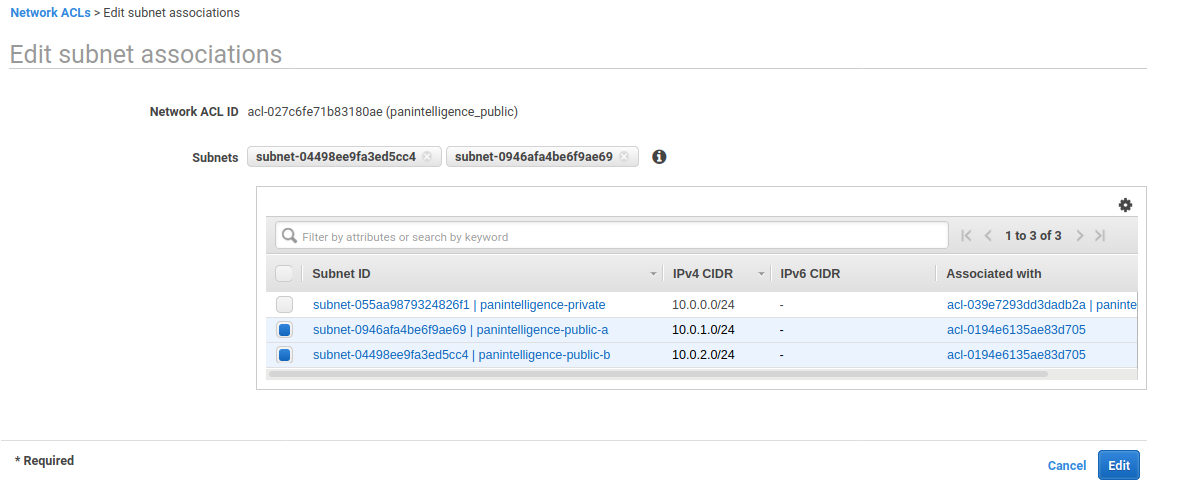
After saving the outbound rules, select the Subnet associations tab at the bottom and select Edit subnet associations.
Select the public subnets you created and click Edit.
Security Groups
To the left of the VPC dashboard select Security Groups and create a security group.
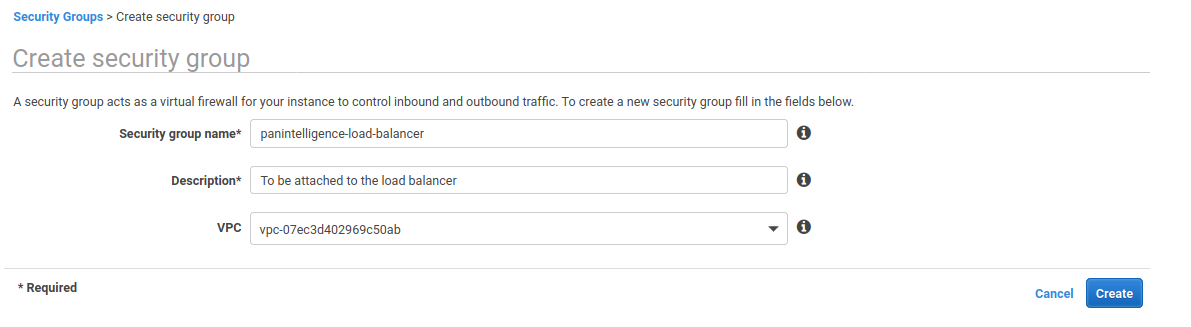
We need to create a security group for the load balancer and a security group for the dashboard application.
Configure the new security group using the image below.
Select the created security group and select the Inbound Rules tab. Edit the inbound rules and configure it to match the screenshot below.

Select the Outbound Rules tab and edit the outbound rules.
Check that the outbound rules match the screenshot below. It should be configured by default.

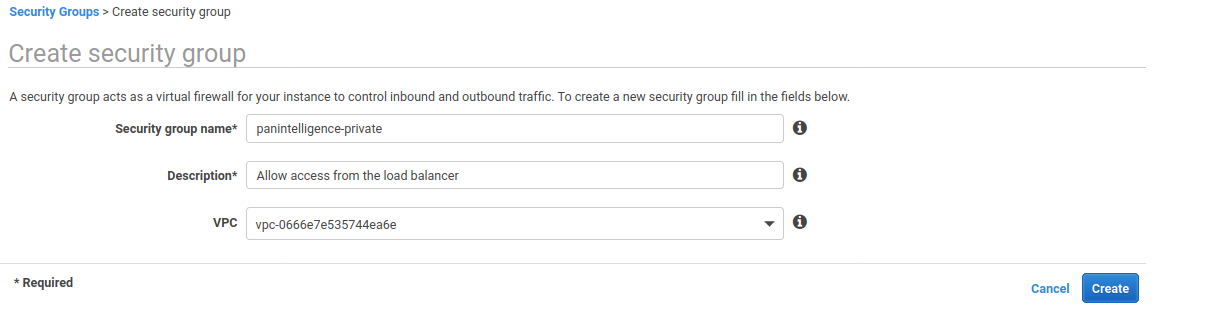
After checking the outbound rules, create a new security group to match the below screenshot.
Select the created security group and select the Inbound Rules tab. Edit the inbound rules and configure it to match the screenshot below.
If you type sg in the Source input, a drop down should appear. Choose your load balancer security group you created earlier.


Check that the outbound rules match the screenshot below. It should be configured by default.
S3 Endpoint
The dashboard image includes some scripts to backup and restore the dashboard using S3.
As the dashboard server is in a private subnet, we need to create an S3 endpoint to allow the dashboard to communicate with S3.
On the left of the VPC Dashboard, click the Endpoints link. From there select the Create Endpoint button.
Make sure that AWS services is selected as the Service category. For the service name, scroll to find the S3 service shown in the screenshot below.
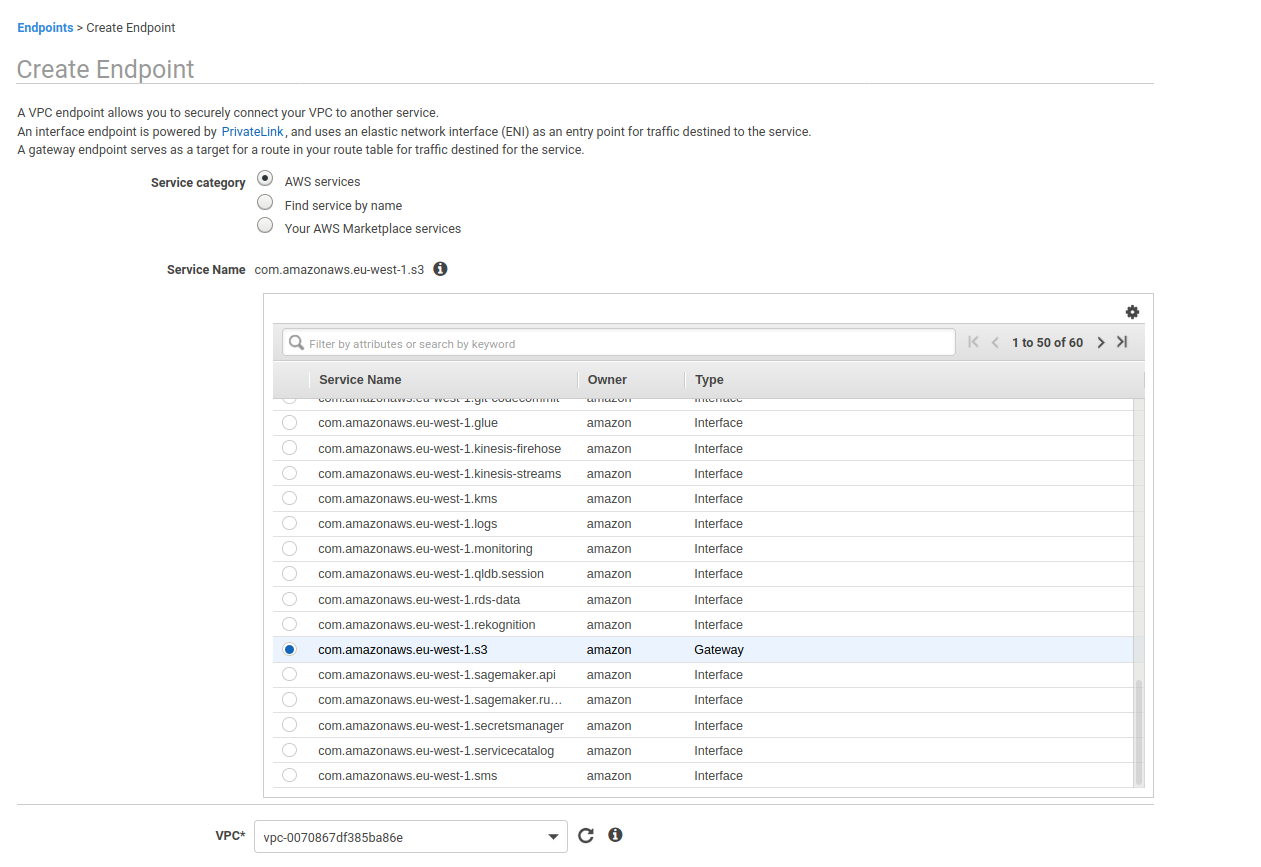
After selecting the S3 service, select the VPC you created earlier from the VPC dropdown.
Select the route table that is associated with your private subnet from the list of route tables.
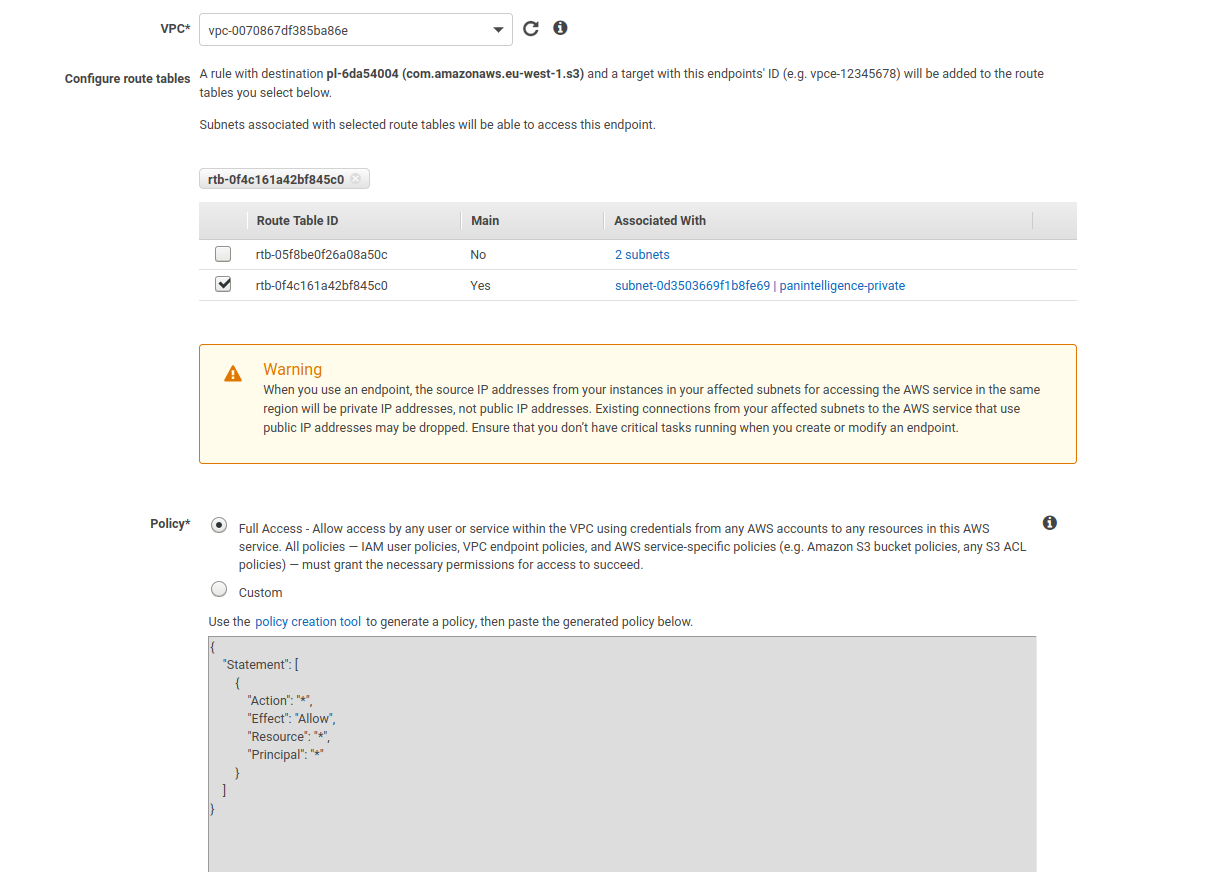
You can then click Create endpoint.
To configure a load balancer, go to the EC2 service dashboard.
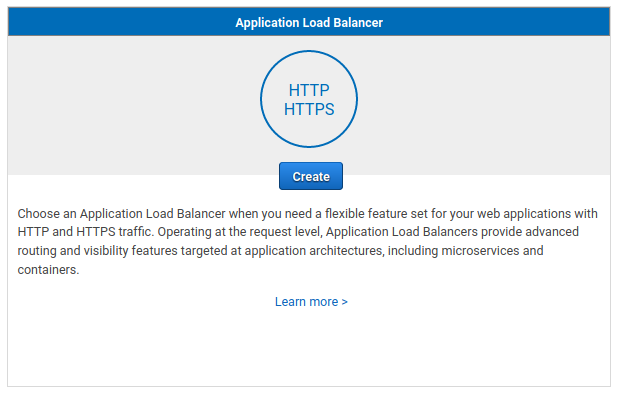
To the left of the EC2 dashboard, under the LOAD BALANCING section, select Load Balancers and create a load balancer.
Select the Application Load Balancer type.
For step 1 of the load balancer configuration, configure it to match the screenshot below.
Made sure you add listeners for both HTTP and HTTPS. A HTTP listener should be there by default.
For the Availability Zones section, make sure you select the VPC you created earlier. You should be able to tick two availability zones. In the dropdown for each availability zone, you should be able to select each public subnet you created.

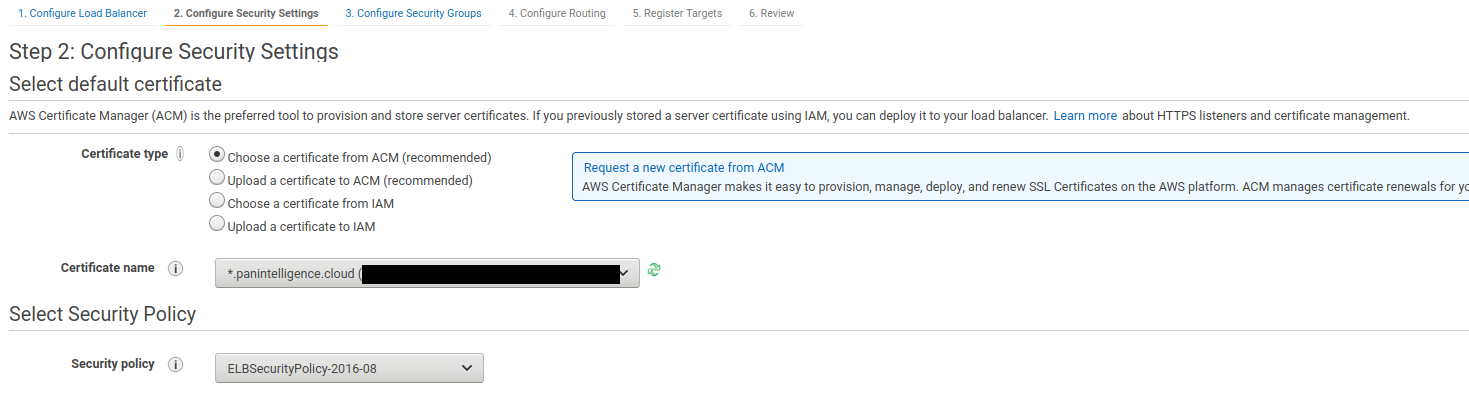
Step 2 of creating the load balancer needs you to select a certificate for the load balancer. Make sure you have completed the prerequisites for this documentation.
Select the certificate you want to use.
Step 3 requires you to select a security group for your load balancer. Deselect the default security group and select the load balancer security group you created earlier.

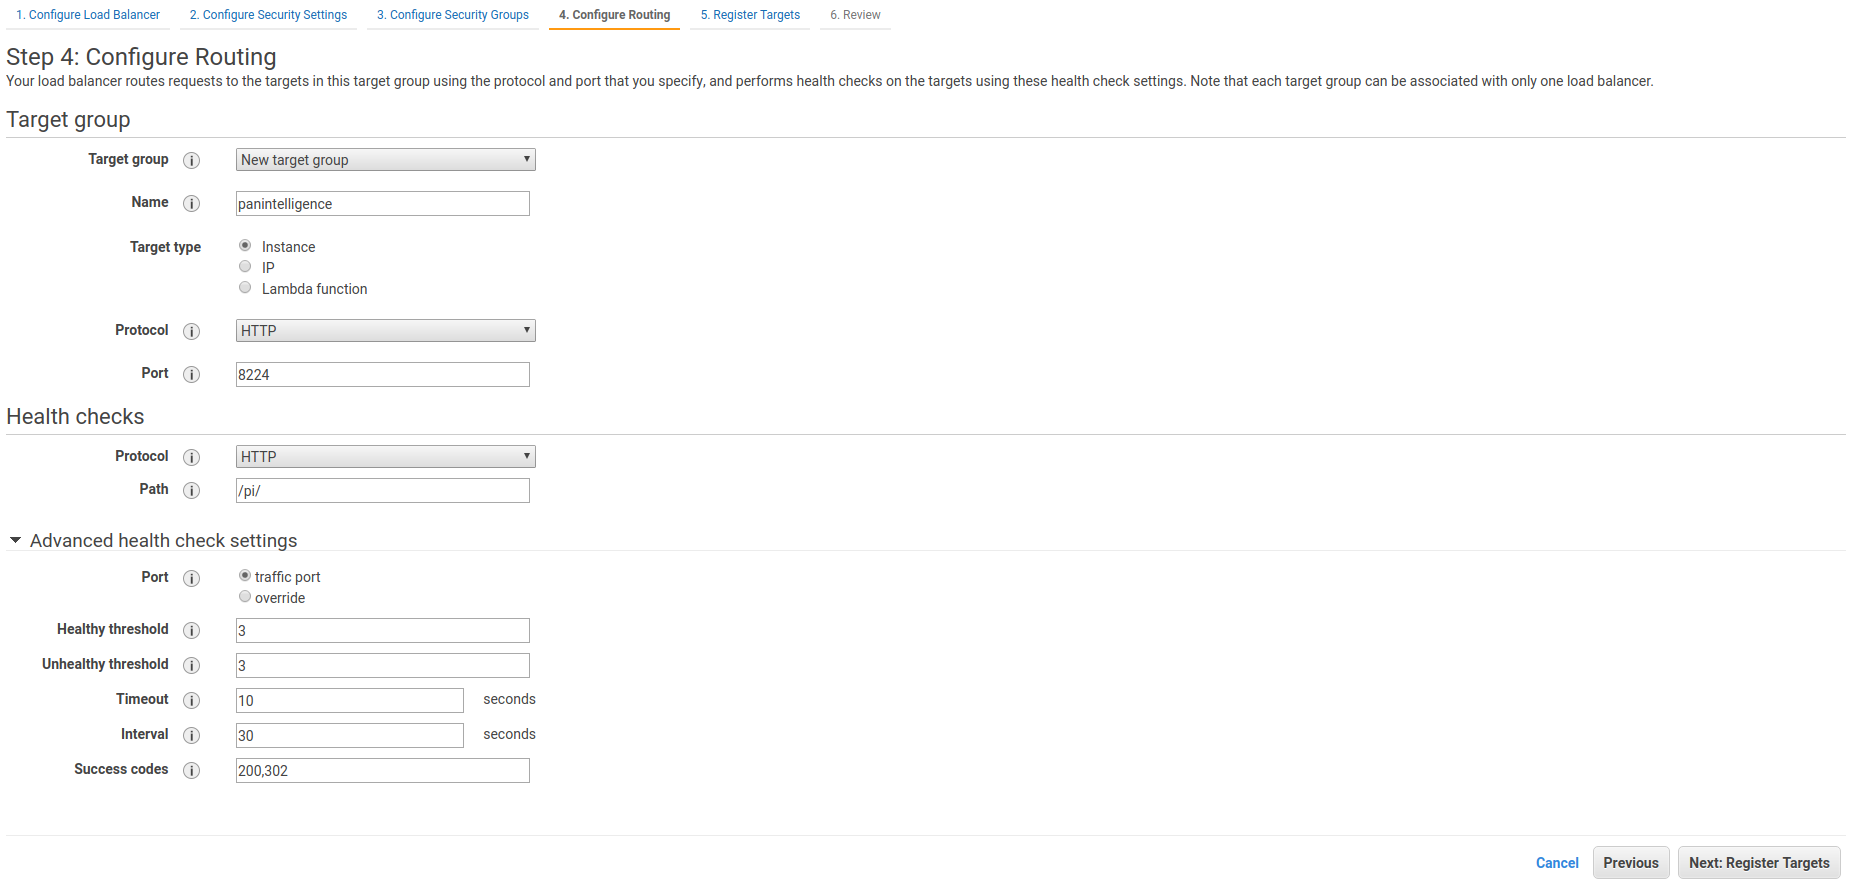
Step 4 requires you to create a target group for your load balancer. Later this target group will contain your panintelligence EC2 instance. For now, configure it to be the same as the screenshot below.
Step 5 does not require us to do anything now. We will register a target later.
The last step is to review the load balancer settings. Check it matches the screenshot below.

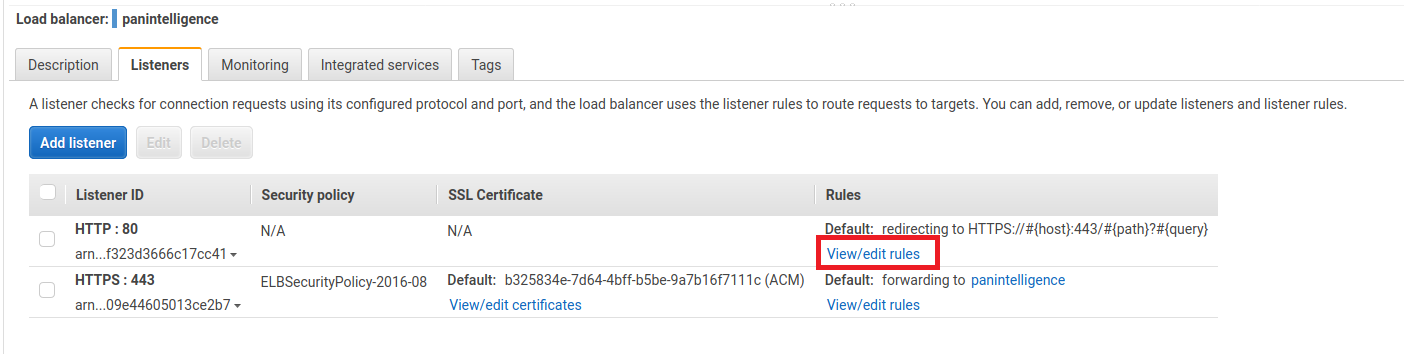
After creating the load balancer, select the load balancer you created and select the Listeners tab at the bottom.
Select View/edit rules for the HTTP: 80 rule.
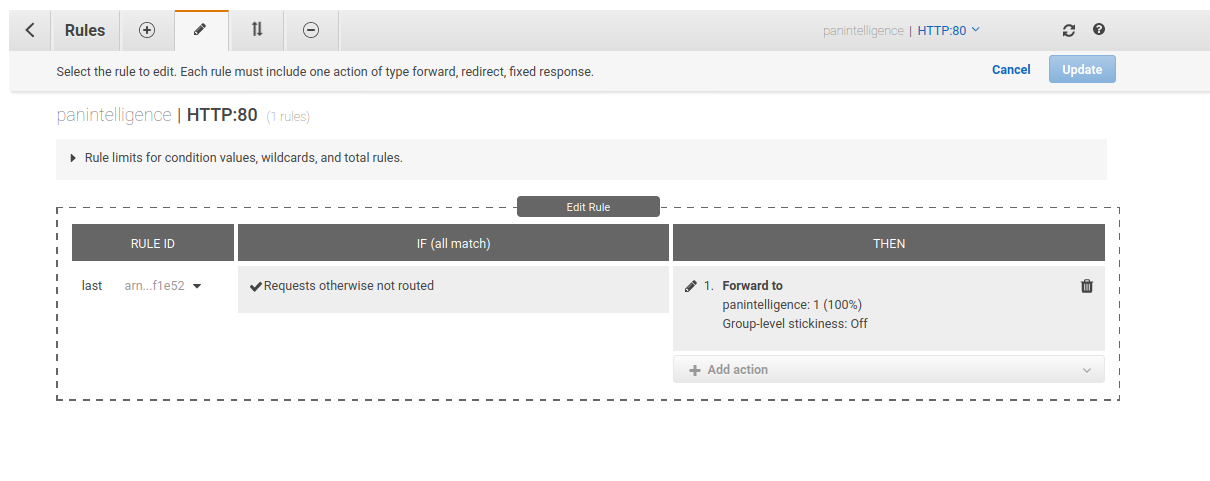
Select the pencil icon at the top of the window to edit the rules and then select the pencil icon next to the rule to edit the rule. Your window should match the screenshot below.
Edit the THEN column of the rule to remove the existing configuration and configure it to match the screenshot below.
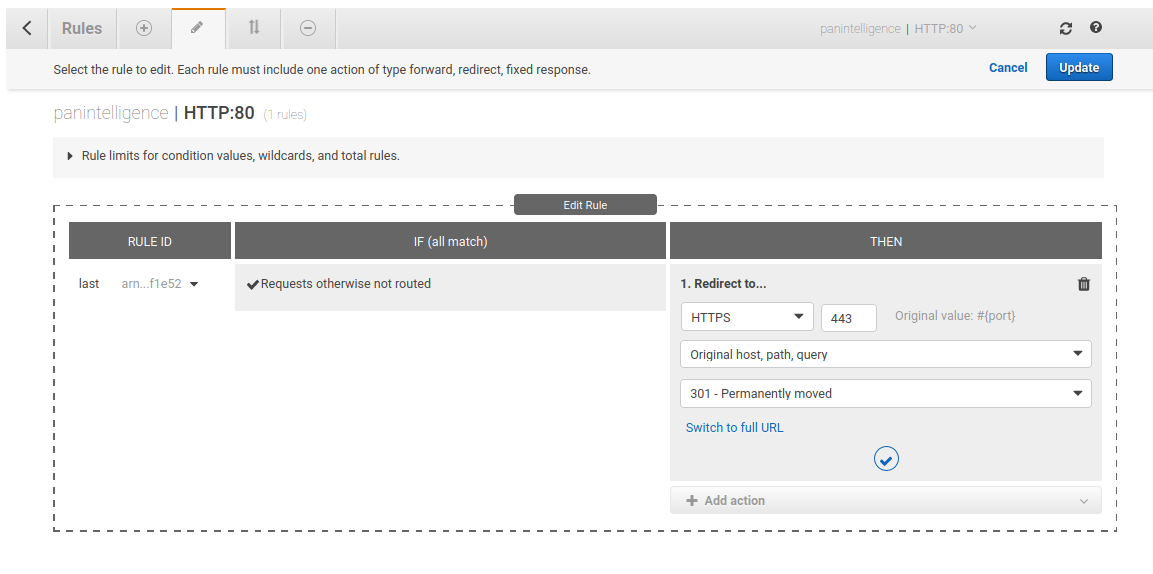
Update that rule and return to the load balancer using the left chevron at the top left of the window.
IAM Role
To backup your dashboard configuration you will need an IAM role that allows access to the S3 bucket you want to use for backups. This section assumes you have met the prerequisite of having an S3 bucket for backups. Please check the prerequisites section if you need to create an S3 bucket.
To do this, go to the IAM service. To the left of the IAM service page there is a Roles link under the Access management header. Select this link.
Select the Create role button at the top. You should then see a page similar to the screenshot below.
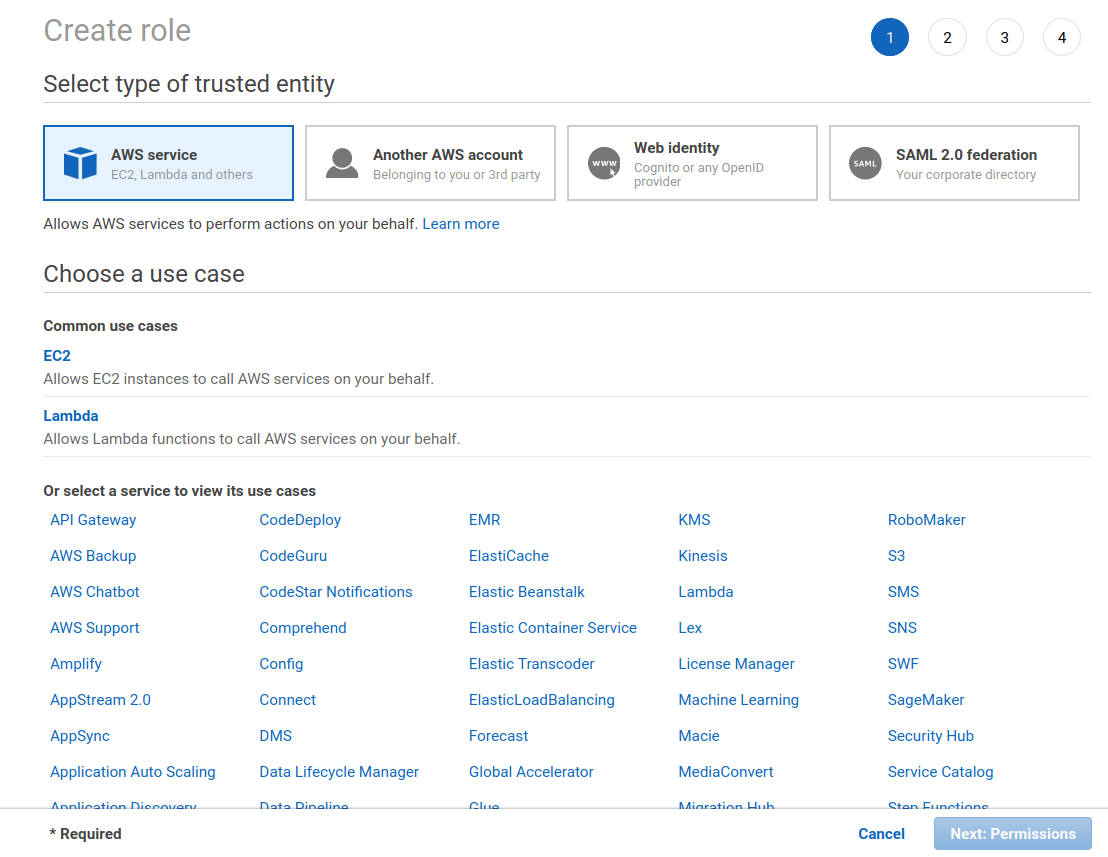
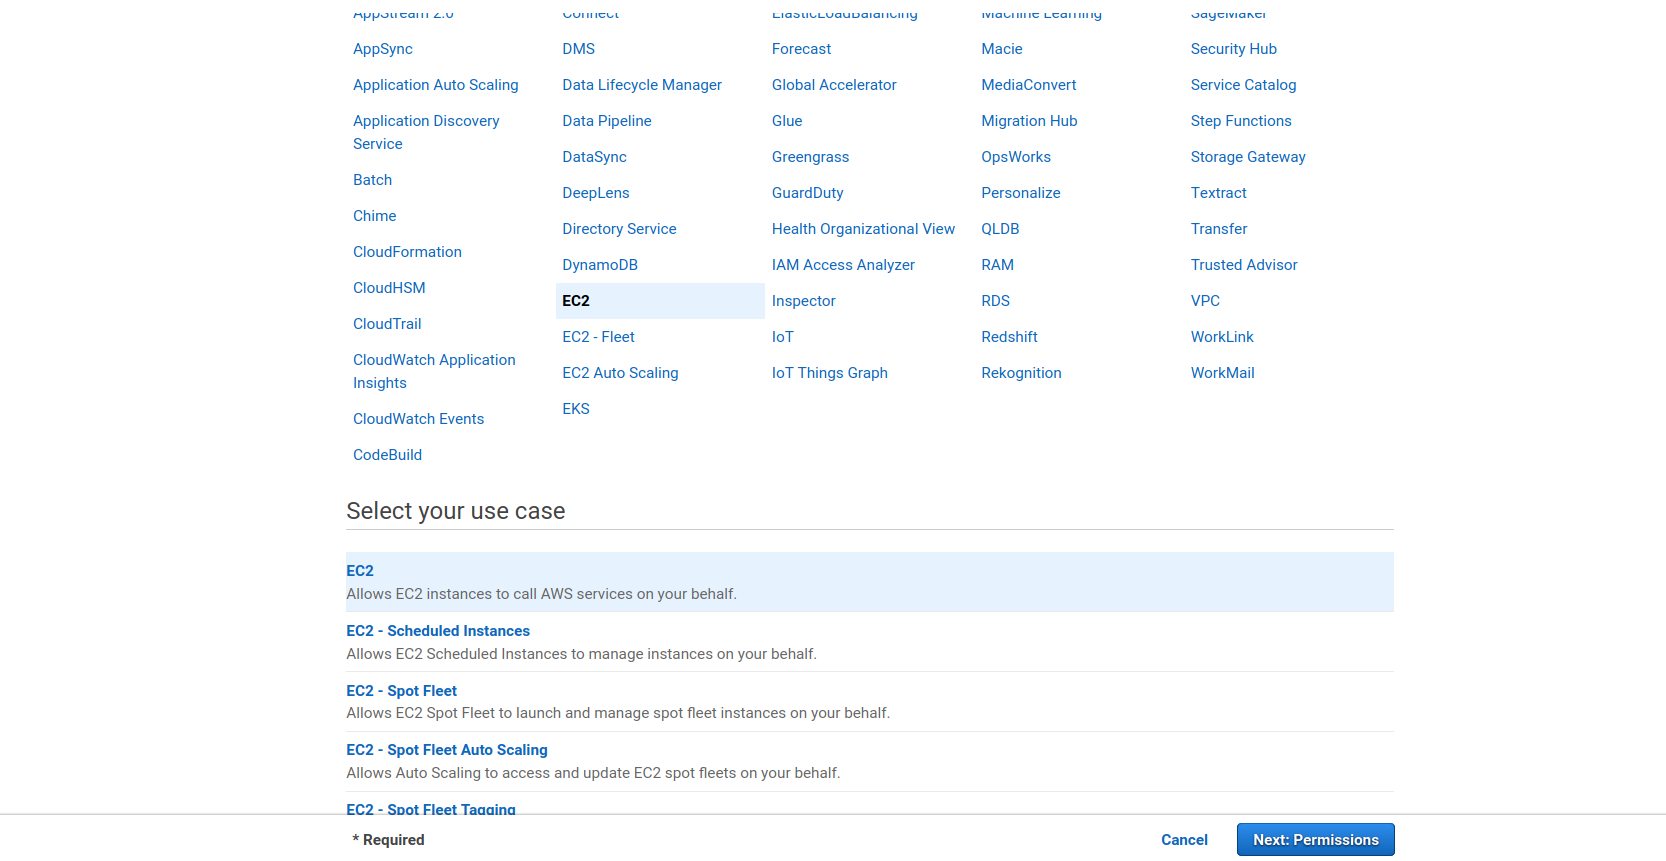
Select the EC2 service from the services. Selecting the EC2 service should open a "Select your use case" section at the bottom of the page. Select EC2 from this list, shown in the screenshot below. You can then select the Next: Permissions button.
The second step is to create a policy that allows you to access your S3 bucket for backups. You should see a page like the screenshot below.

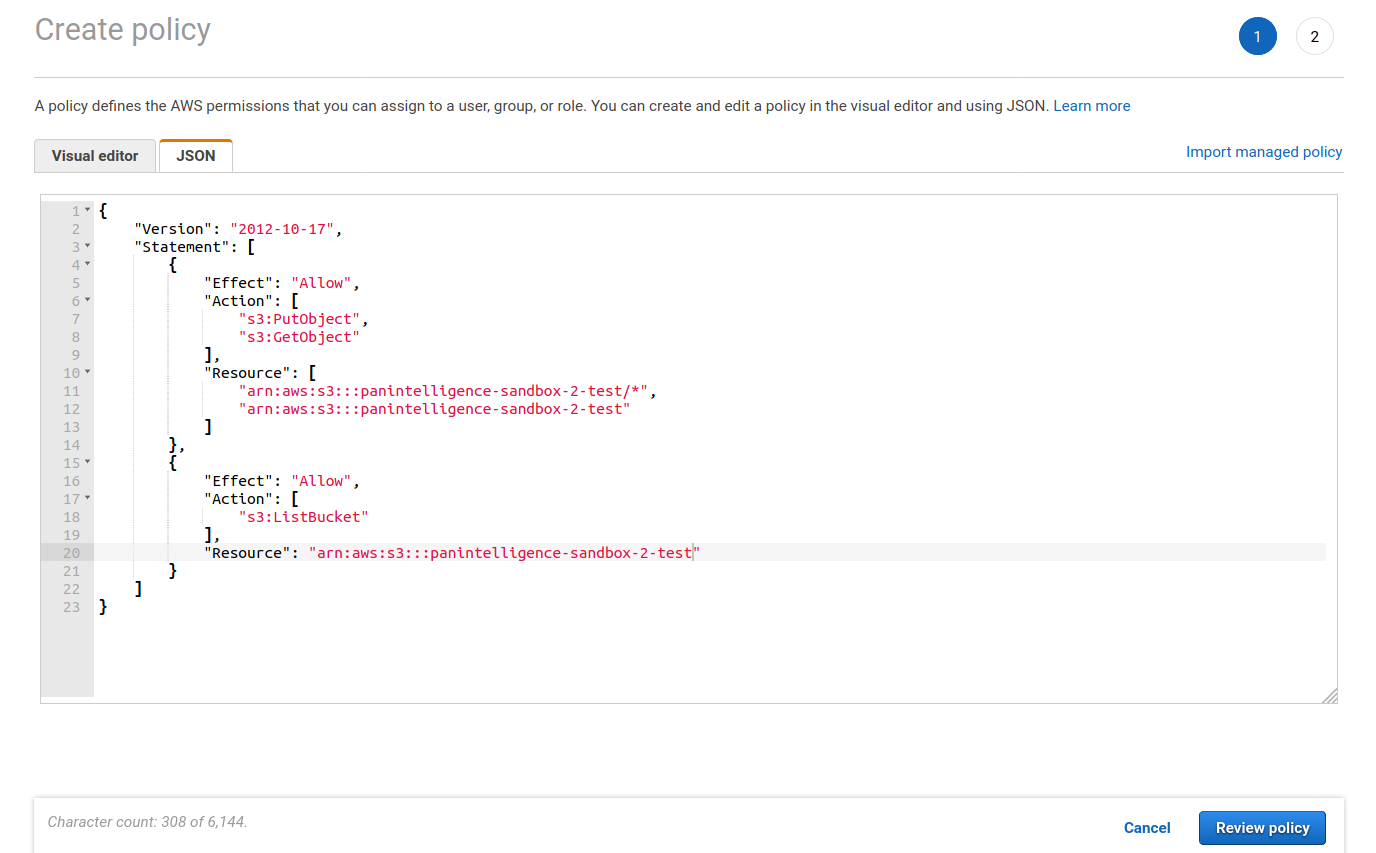
Select the Create policy button. This show open a new window. Select the JSON tab and copy the JSON below into the editor. Make sure you replace your-bucket-name with the name of your bucket.
{
    "Version": "2012-10-17",
    "Statement": [
        {
            "Effect": "Allow",
            "Action": [
                "s3:PutObject",
                "s3:GetObject"
            ],
            "Resource": [
                "arn:aws:s3:::your-bucket-name/*",
                "arn:aws:s3:::your-bucket-name"
            ]
        },
        {
            "Effect": "Allow",
            "Action": [
                "s3:ListBucket"
            ],
            "Resource": "arn:aws:s3:::your-bucket-name"
        }
    ]
}
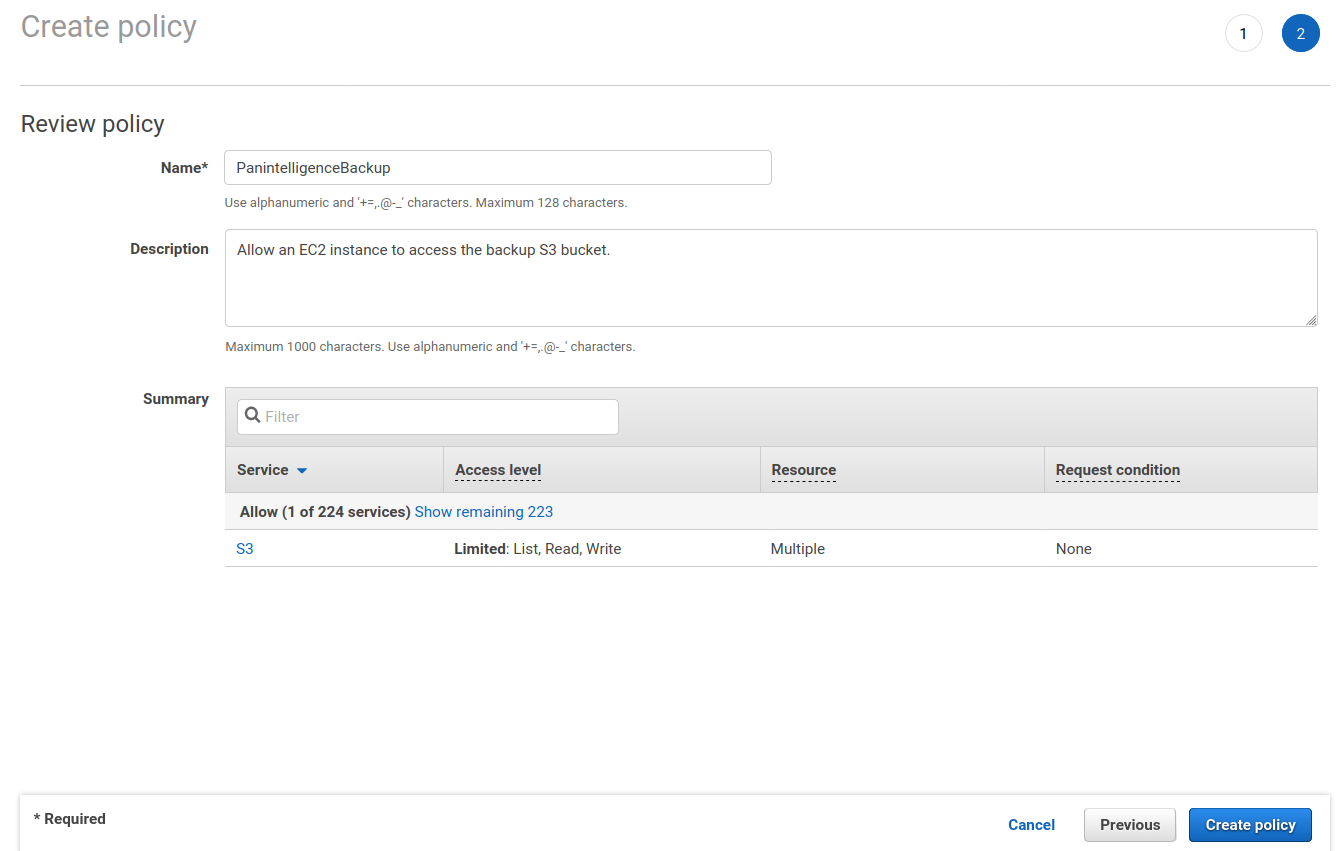
The policy creation window should look like the screenshot below. Click the Review policy button.
You will need to give the policy a name. You can then click Create policy.
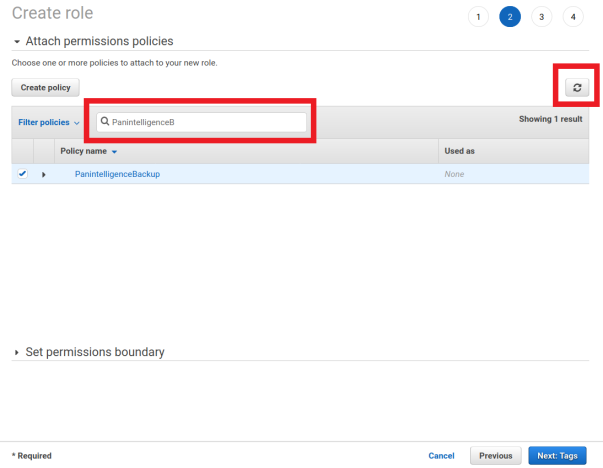
Switch back to the role creation tab in your browser. Click the refresh button to refresh the policy list.
Search for the policy you just created and select the checkbox next to it. You can then select the Next: Tags button.
Add some tags to match your company tagging policy, if you have one, and then click Next: Review.
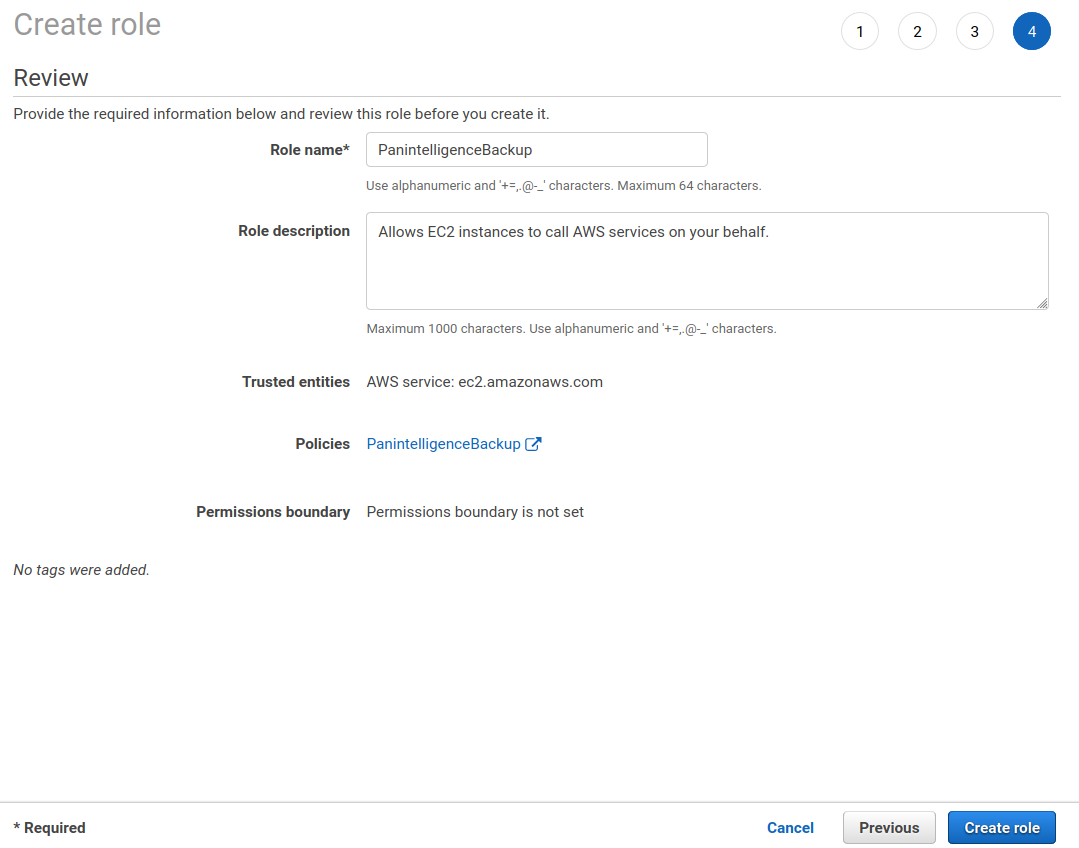
You will need to give the role a name. You can then click Create role.
AMI
To be able to use the Panintelligence Amazon Machine Image (AMI) you need to subscribe using the AWS marketplace. Follow the link below of the marketplace product you would like to use.
- 30 day trial
- Developer edition (available soon)
Following one of the above links should take you to a page similar to the one in the screenshot below.
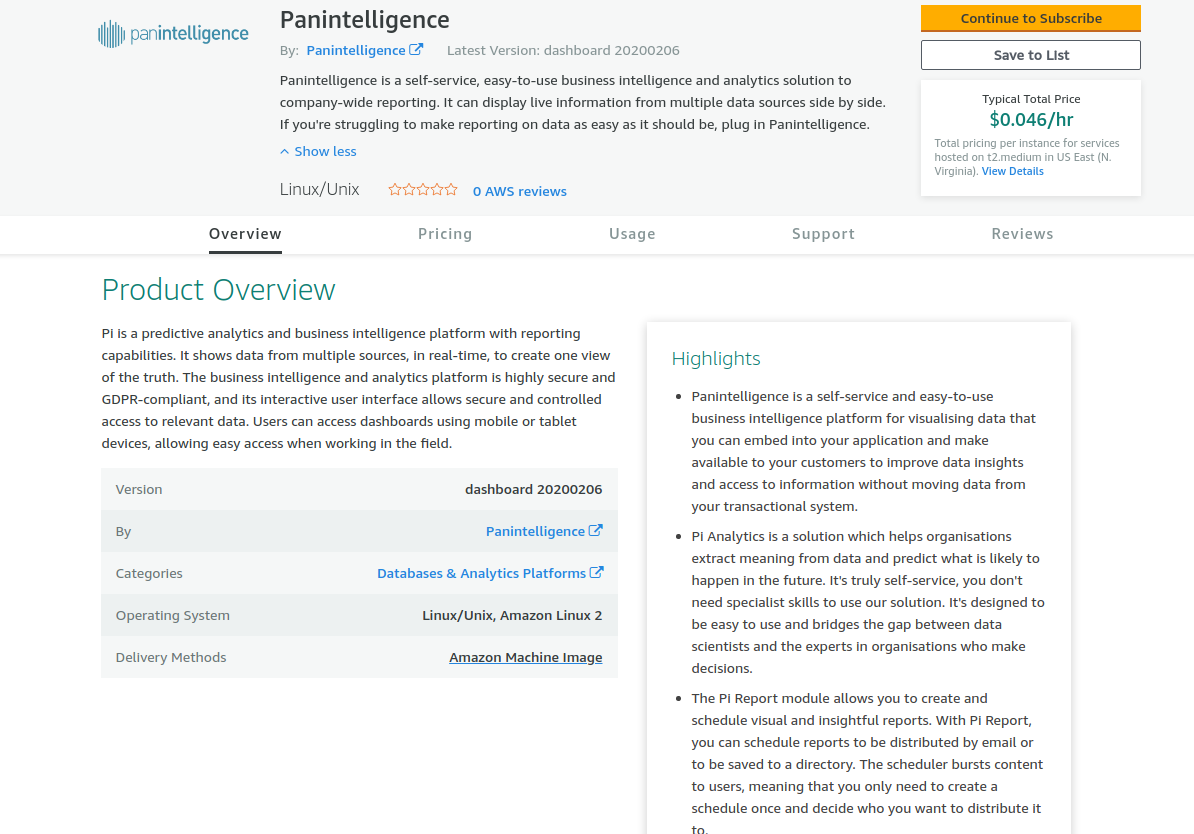
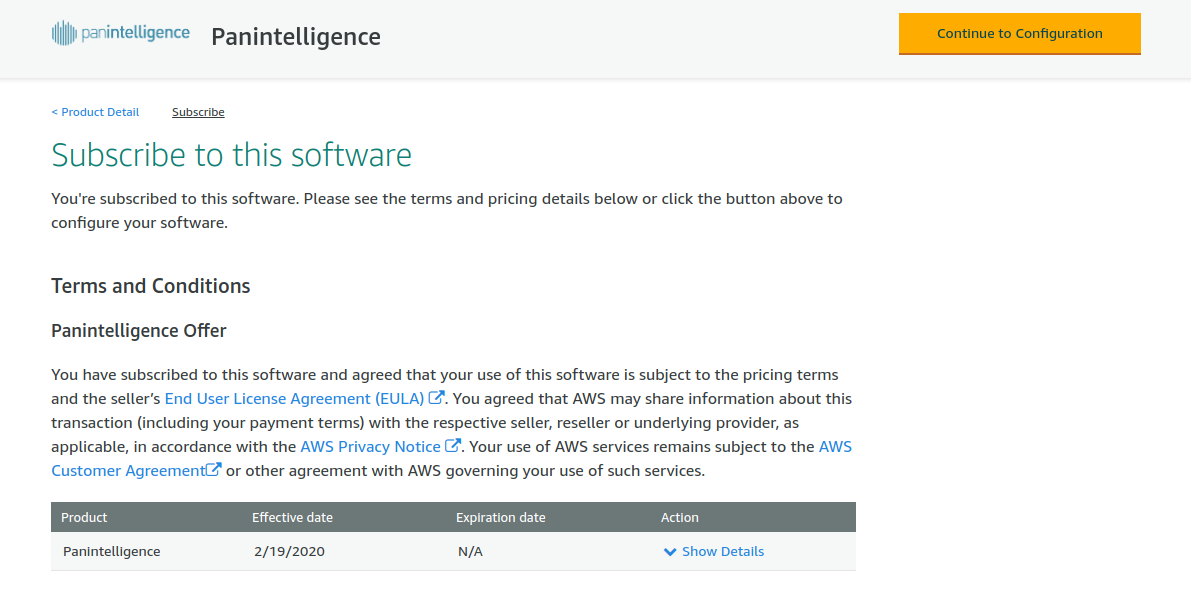
Select the Continue to Subscribe button. You should see a page similar to the one below. Select the Continue to Configuration button.
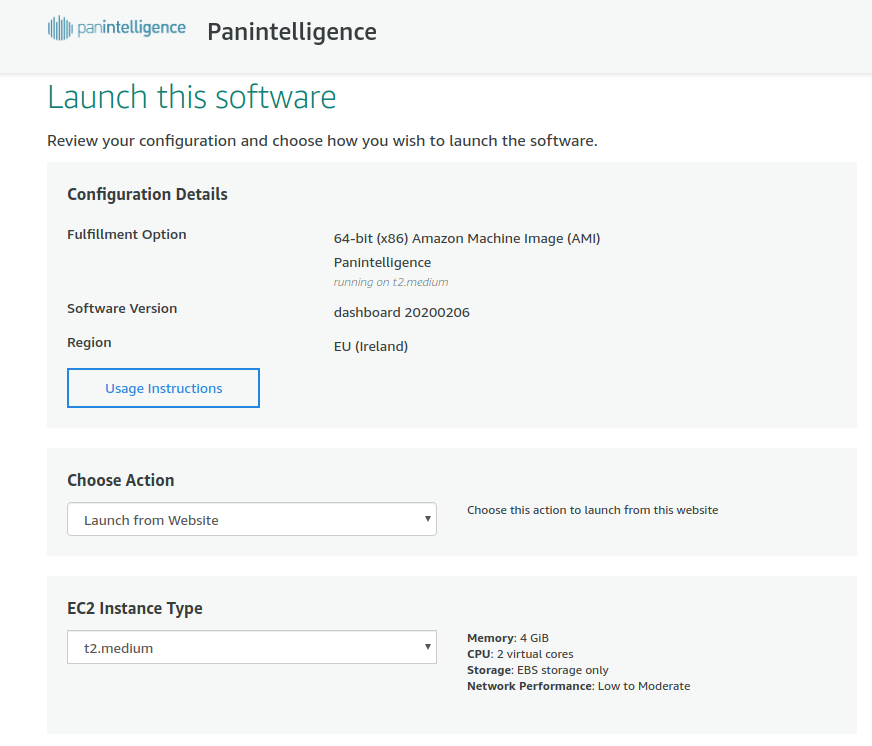
At the configuration step you will see a page like the screenshot below. Select the latest Software Version if it is not selected already. The Region you select will need to match the region you used to configure the VPC and load balancer earlier. This document uses the EU (Ireland) region.
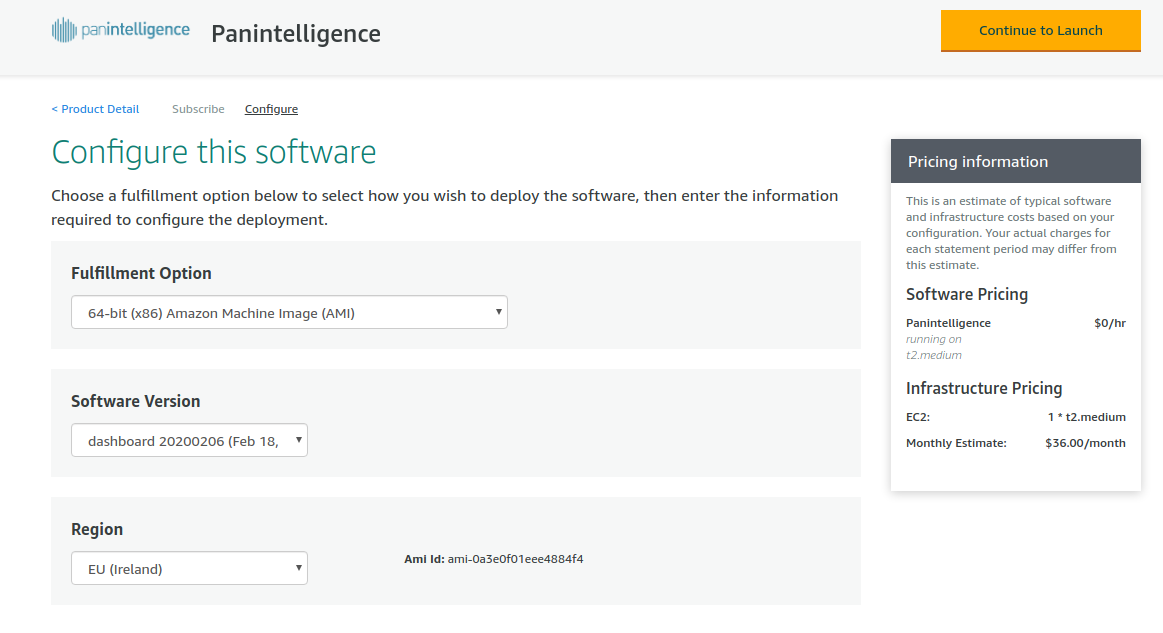
When your configuration is correct, select the Continue to Launch button.
This section will let you configure the instance and launch it.
For EC2 Instance Type we recommend t2.medium.
For VPC Settings select the VPC id of the VPC you created earlier.
For Subnet Settings select the subnet id of the private subnet you created.
For Security Group Settings select the private security group you created.
For Key Pair Settings select the key pair you want to use with the EC2 instance.Documentation to create a key pair is linked in the prerequisites section.
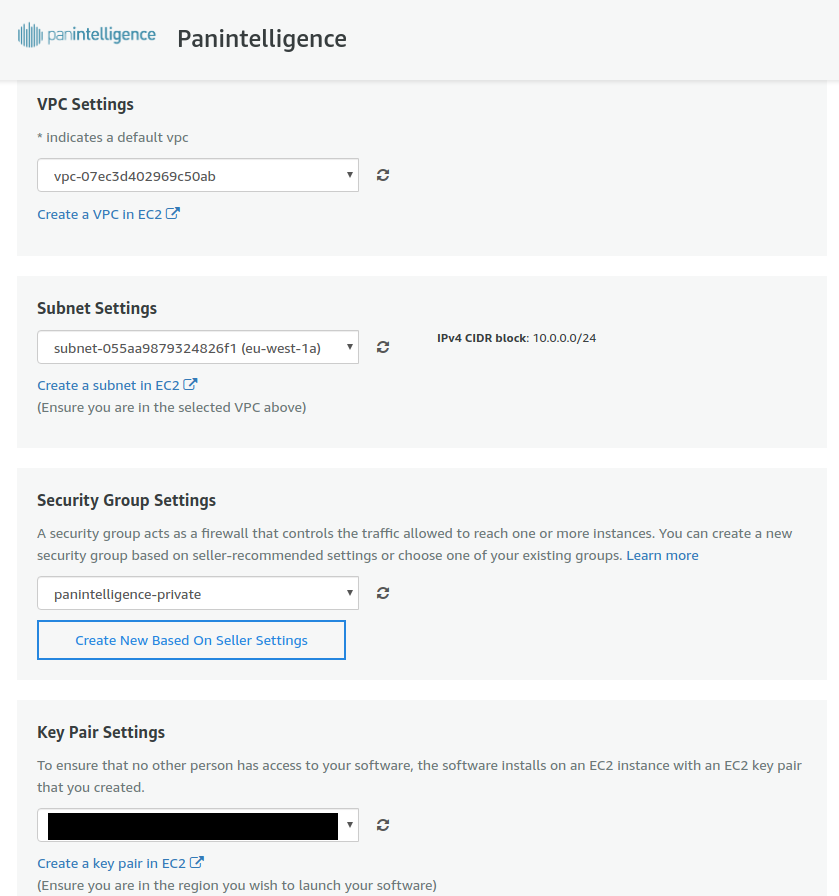
After configuring the settings, select the Launch button.
You should see a message confirming that the EC2 instance has been launched.
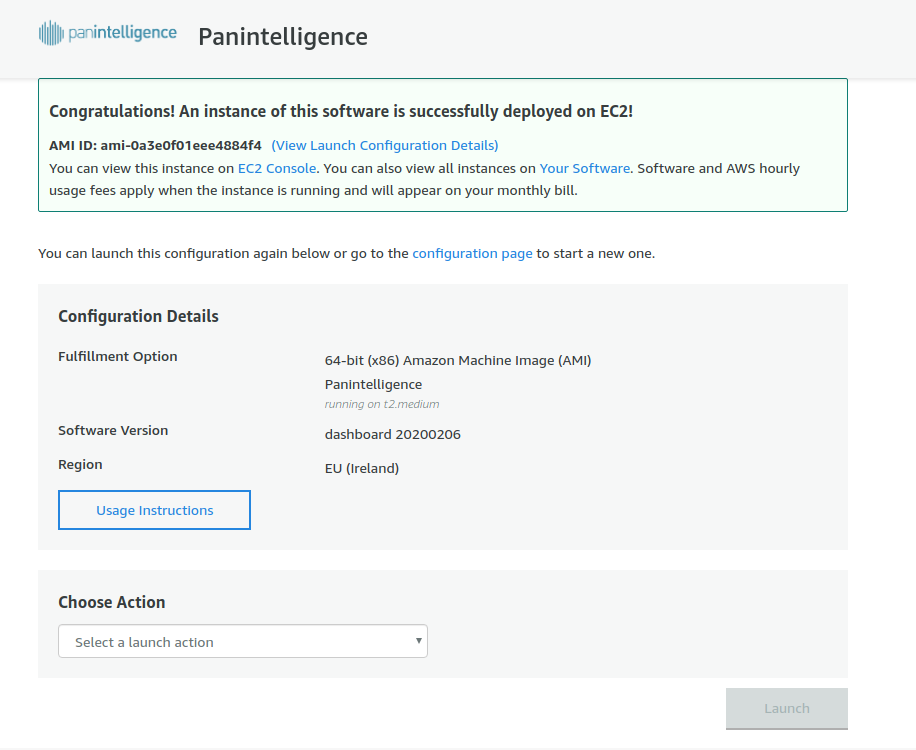
The confirmation message gives you a link to the EC2 Console to check the instance is running. Going to the EC2 console and selecting the Instances link on the left will show you what instances you have running.
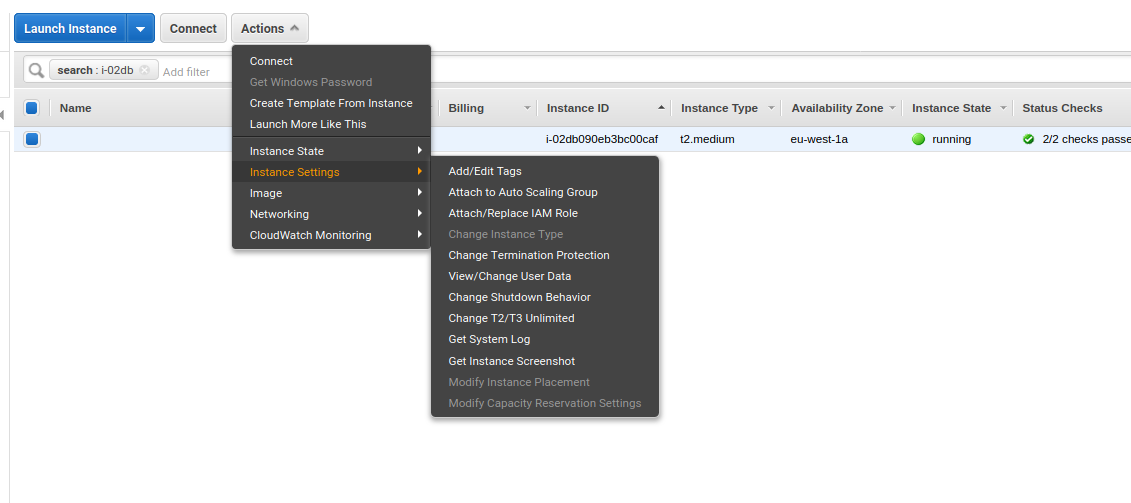
We need to attach the IAM role you created earlier to the EC2 instance you have just launched from the marketplace.
In the instances section of the EC2 Dashboard, select the instance you have just launched. Then select the Actions button, then Instance settings, then Attach/Replace IAM Role, like in the screenshot below.
In the window that opens, select the role you created from the dropdown.

You can then click the Apply button, and then the Close button.
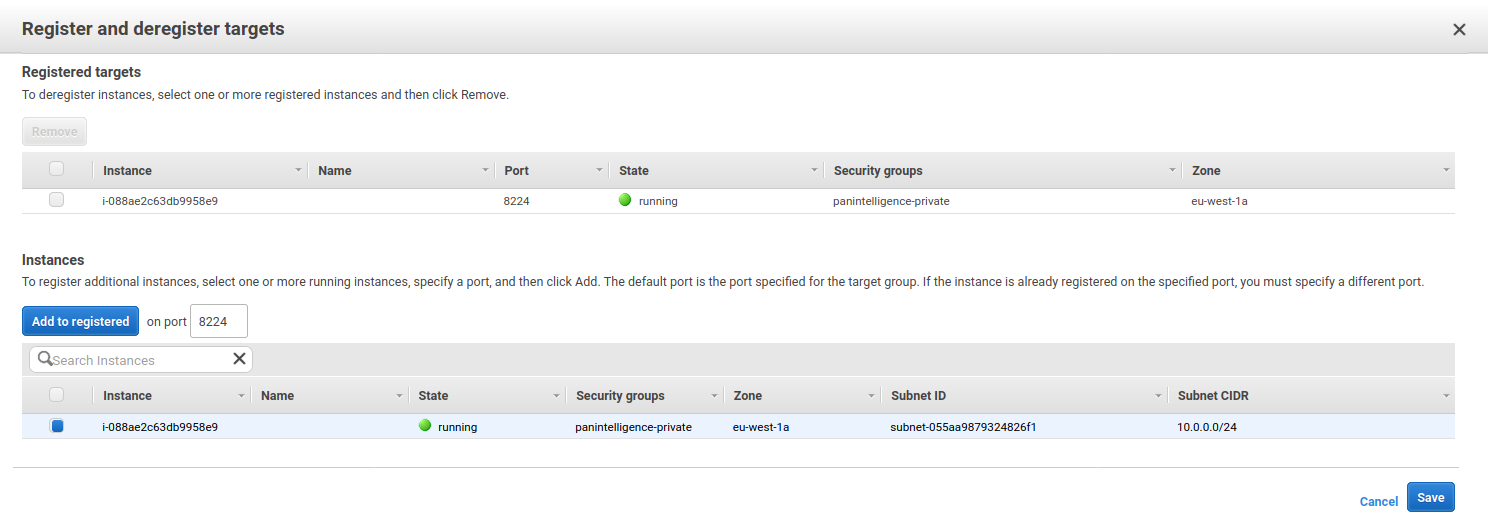
Now the instance is running we need to associate the instance with the load balancer. You do this by adding a target to the load balancer target group we created earlier.
In the EC2 service dashboard, select the Target Groups link on the left.
Select the target group you created earlier, select the Targets tab at the bottom and then select Edit.
Select the EC2 instance you launched from the marketplace and click Add to registered.
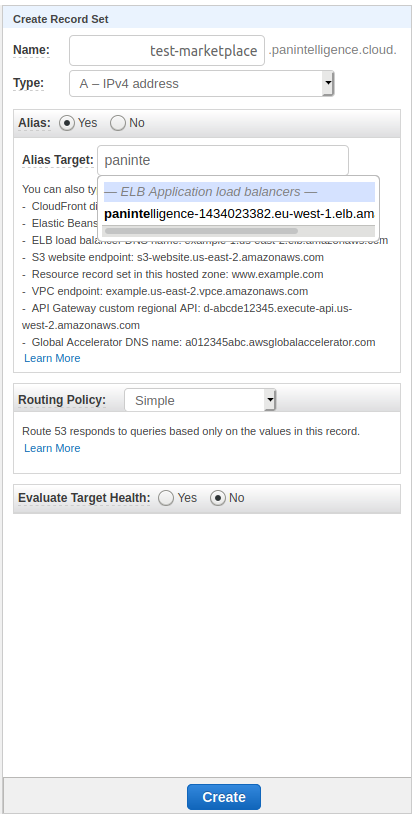
Finally, we need to create a Route 53 record that aliases to the load balancer.
Navigate to the hosted zone you want to use in Route 53 and create a record set.
Type the subdomain you want to use in the Name field.
Make sure the Type selected is A - IPv4 address and Alias is set to Yes.
In the Alias Target field, start typing the name of the load balancer and select it when it appears.
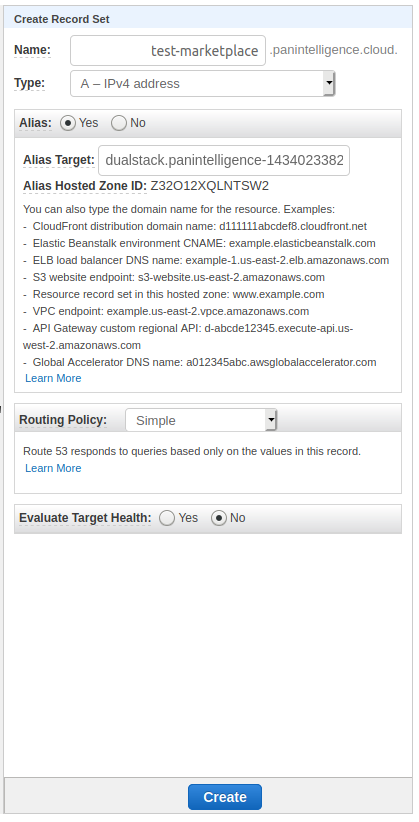
You should now be able to access the dashboard at the domain you configure in the Route 53 record (the DNS entry can sometimes take a little bit to propagate if it doesn't work immediately).
This step is optional for all instances except the deploy instance (This requires egress access to the internet to permit outbound traffic containing billing information.)
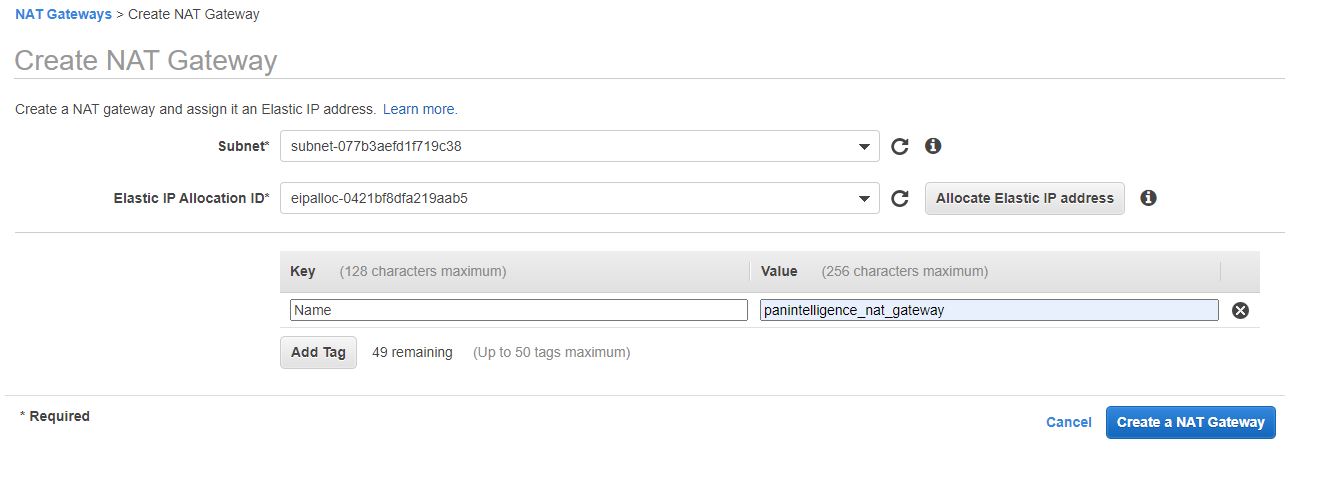
Under the VPC page, select the NAT gateway option on the left menu bar.
Click the "Create NAT Gateway button"
Under subnet, Select "panintelligence-public-a"
Click the Allocate Elastic IP Address. This option will automatically create an elastic IP address and attach it to this new NAT Gateway.
Add the tag Name : panintelligence_nat_gateway
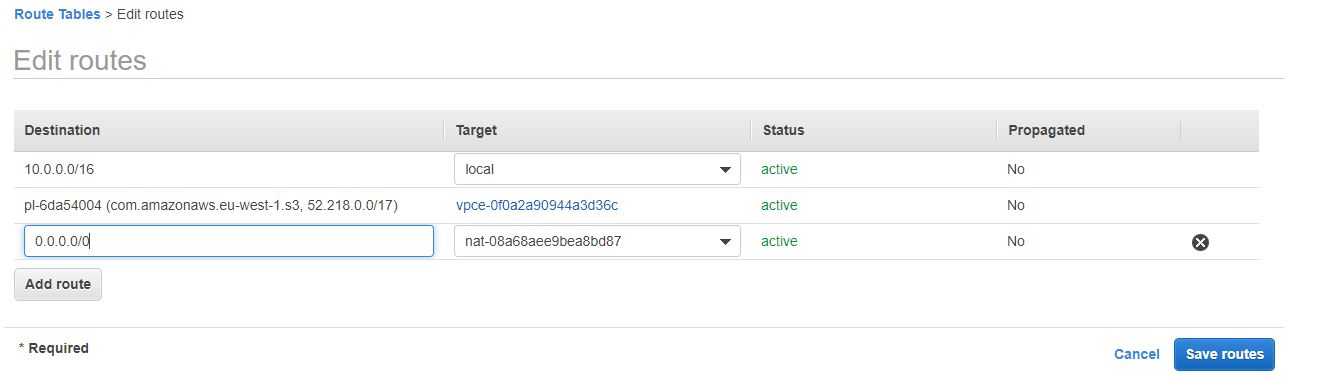
Open the route table page by clicking the Route tables on the menu tab on the left.
Highlight the private subnet and click the routes tab
Click the edit routes button followed by the add routes button to the subsequent screen.
Add our new NAT Gateway to the routes
In the VPC menu, click the Network ACLs on the menu on the left once more. Select the public subnet and under the inbound rules tab, add the route to permit inbound traffic from anywhere on all ports.

Now we need to create an additional policy to allow our instance to communicate with the metering API and to allow it to ascertain whether it belongs to an autoscaling group.
{
    "Version": "2012-10-17",
    "Statement": [
        {
            "Action": [
                "aws-marketplace:MeterUsage"
                ],
            "Effect": "Allow",
            "Resource": "*"
        },
		{
			"Action":[
				"autoscaling:DescribeAutoScalingInstances",
				"ec2:DescribeInstances"
			],
			"Effect": "Allow",
			"Resource": "*"
		}
    ]
}
Now We attach this to our panintelligenceBackup Role so our EC2 instance inherits all the necessary permissions to configure itself.
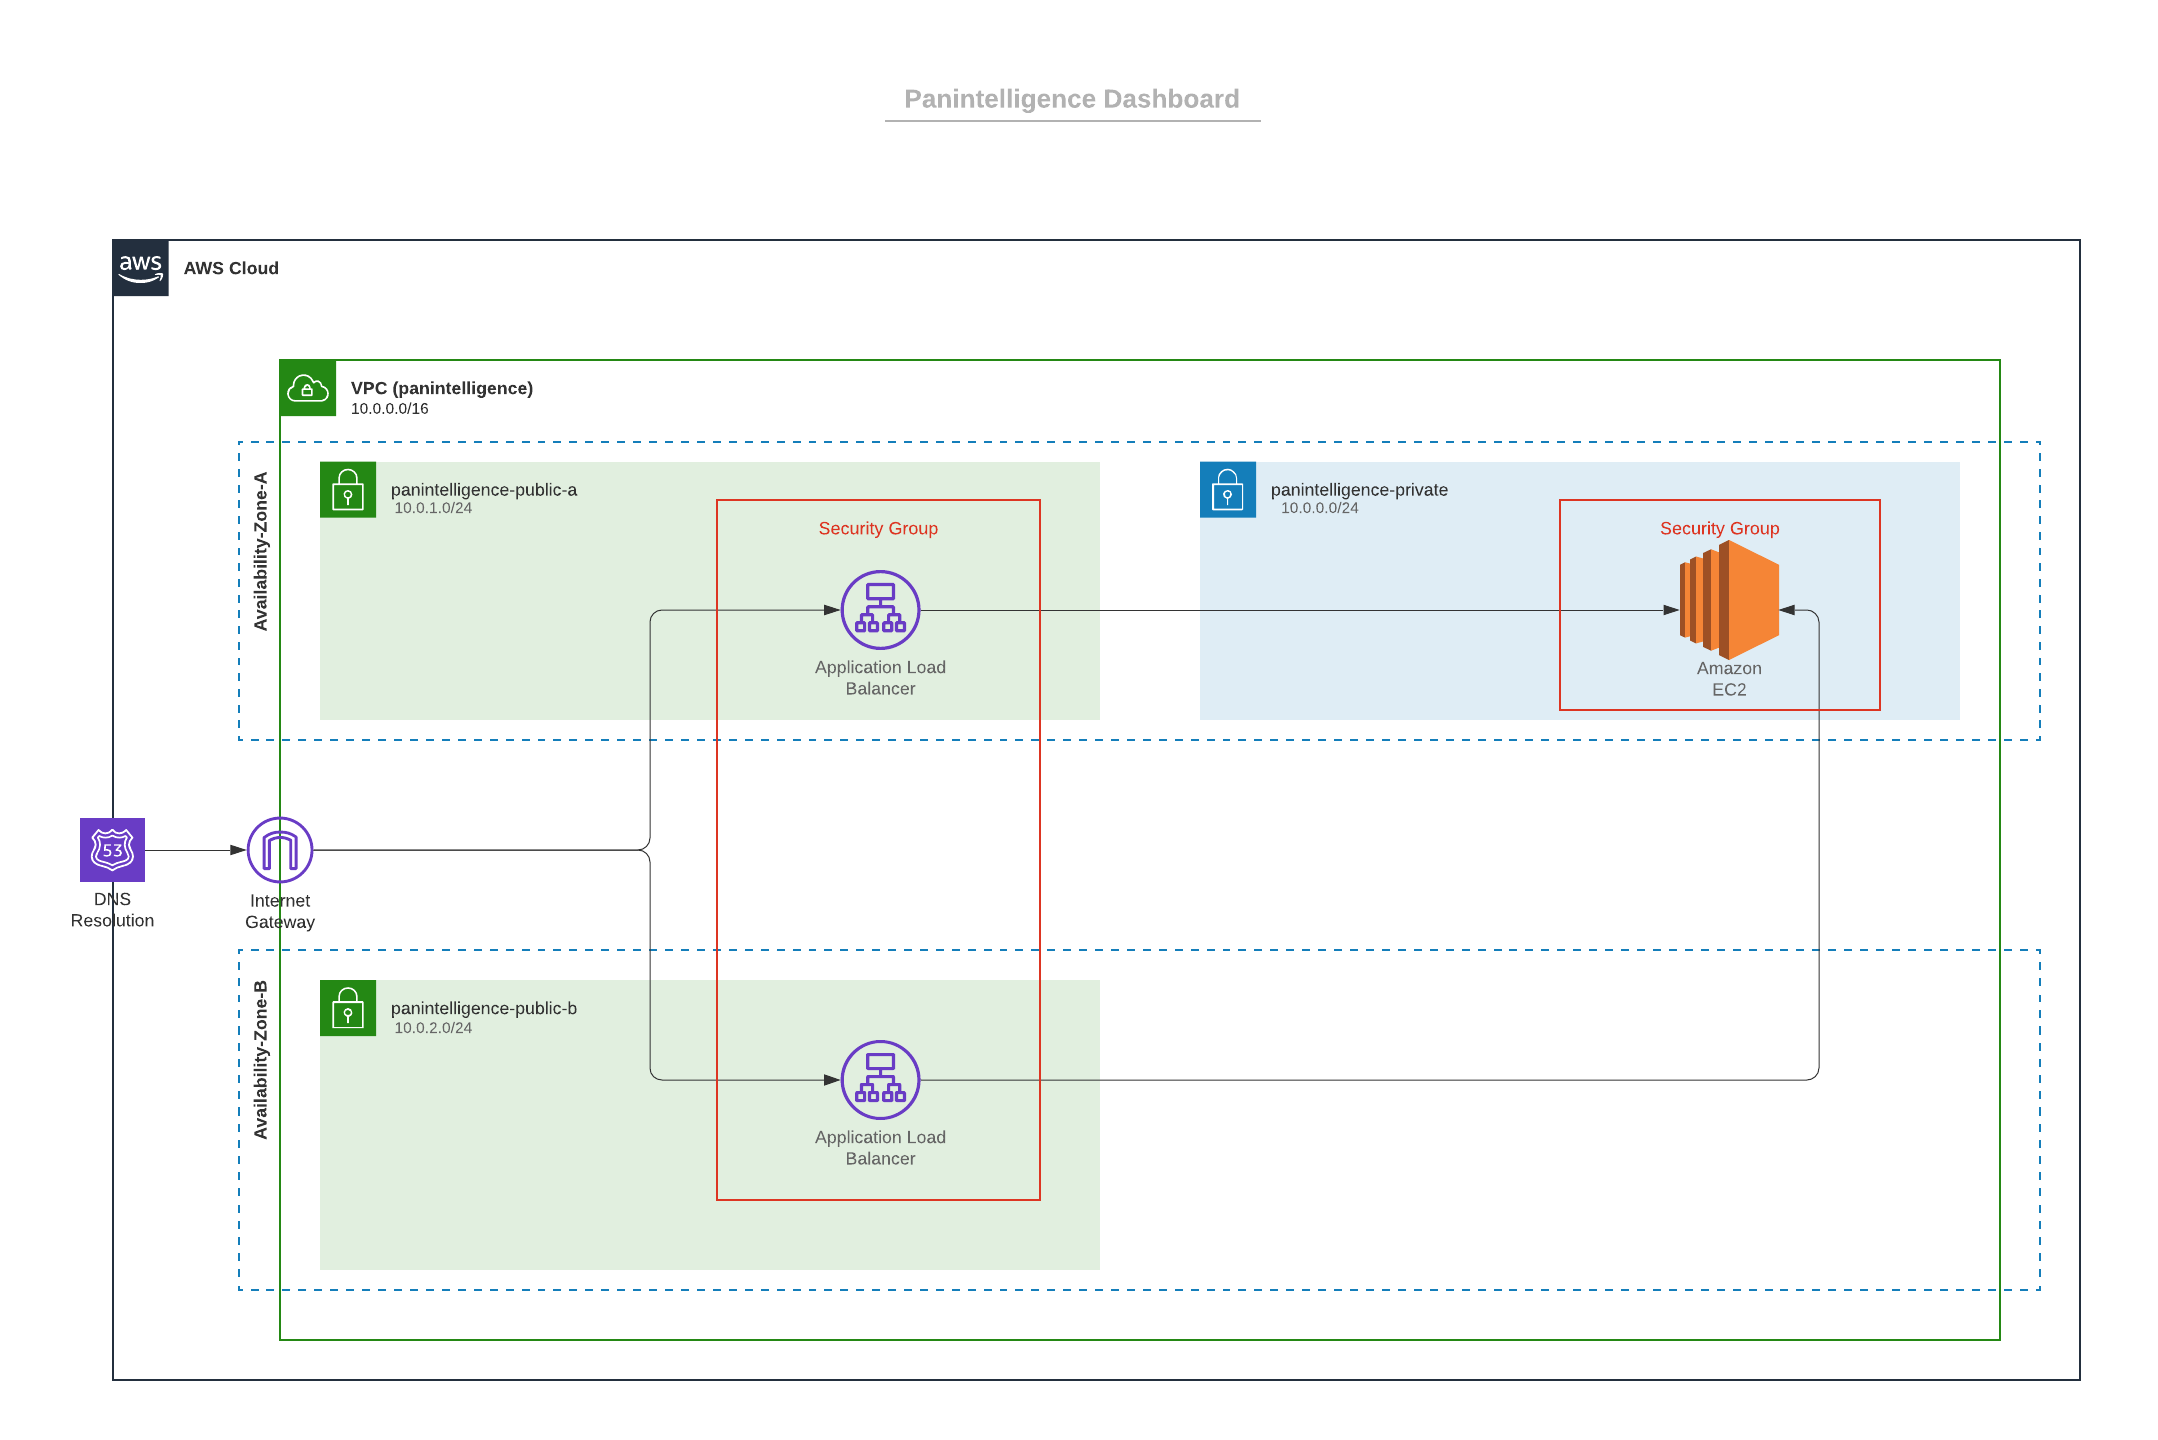
Infrastructure Diagram
Logging into the dashboard
Follow the link https://<your dashboard public address>:8224 to access your new dashboard.
Upon initial login to the dashboard, you will require a username and password. These are:
- Username : admin
- Password : <your AWS EC2 Instance ID>
BYOL Only: Obtaining and installing your licence
If you're using the BYOL listing from the marketplace, you will need to install your licence. Please reach out to your account manager for your licence file.
- Please log into your instance using ec2-user
- Copy your licence to your instance
- Execute: sudo su - pi-user
- copy your licence to /opt/pi/Dashboard/tomcat/webapps/panLicenceManager/WEB-INF/classes
Deploy Version:Auto Scaling group
In order to
Administrative Considerations
If you followed our recommended setup above, you will need to configure a bastion host for SSH access to the instance as it is in a private subnet.
By default, the ec2-user account can be used to access your deployed AMI image. As part of the stand up, you should have defined a key value pair, please use this when logging in under ssh security
Logs
- Log into the deployed AMI using the ec2-user account.
- The dashboard application runs as pi-user. you can log in as that user by running
- sudo -u pi-user -i
- Logs are stored under /opt/pi/Dashboard/tomcat/logs/
- There are no housekeeping rules set on this folder as default, you may wish to add your own.
Restarting the Dashboard
- To restart the dashboard, please execute:
- sudo -u pi-user -i
- /opt/pi/Dashboard/dashboard.sh all stop
- Verify the services have stopped /opt/pi/Dashboard/dashboard.sh all status
- /opt/pi/Dashboard/dashboard.sh all start
- You may verify the the service has restarted /opt/pi/Dashboard/dashboard.sh all status
Upgrading/backing up the panintelligence dashboard
Please follow these steps when you wish to migrate your panintelligence to a new version of the software which we release regularly or if you wish to upgrade to the developer path (as found in the Marketplace)
We have created 2 scripts for you. They back up key resources which, when applied to a fresh install, will bring all of your changes.
- Log into the deployed AMI instance using the ec2-user account.
- initiate the backup
- sudo -u pi-user -i
- /opt/pi/Dashboard/s3_backup.sh --s3-bucket=<your s3 bucket name>
- restore your backup on a new host
- Please stop the dashboard prior to running these steps (please see restarting the dashboard)
- sudo -u pi-user -i
- /opt/pi/Dashboard/s3_restore.sh --s3-bucket=<your s3 bucket name> --zip-file=<specify path in s3>
- If no zip-file option is presented, the restore routine will use the latest backup.
- After you've copied the files across to your new host, you can start the dashboard. The database will automatically align to the latest version of the software.